ADLINK-IST Connected Factories > EOS-iSeries > Getting start with Yolov3
Getting start with Yolov3
This tutorial will guide you how to getting start with EOS-iSeries from un-boxing.
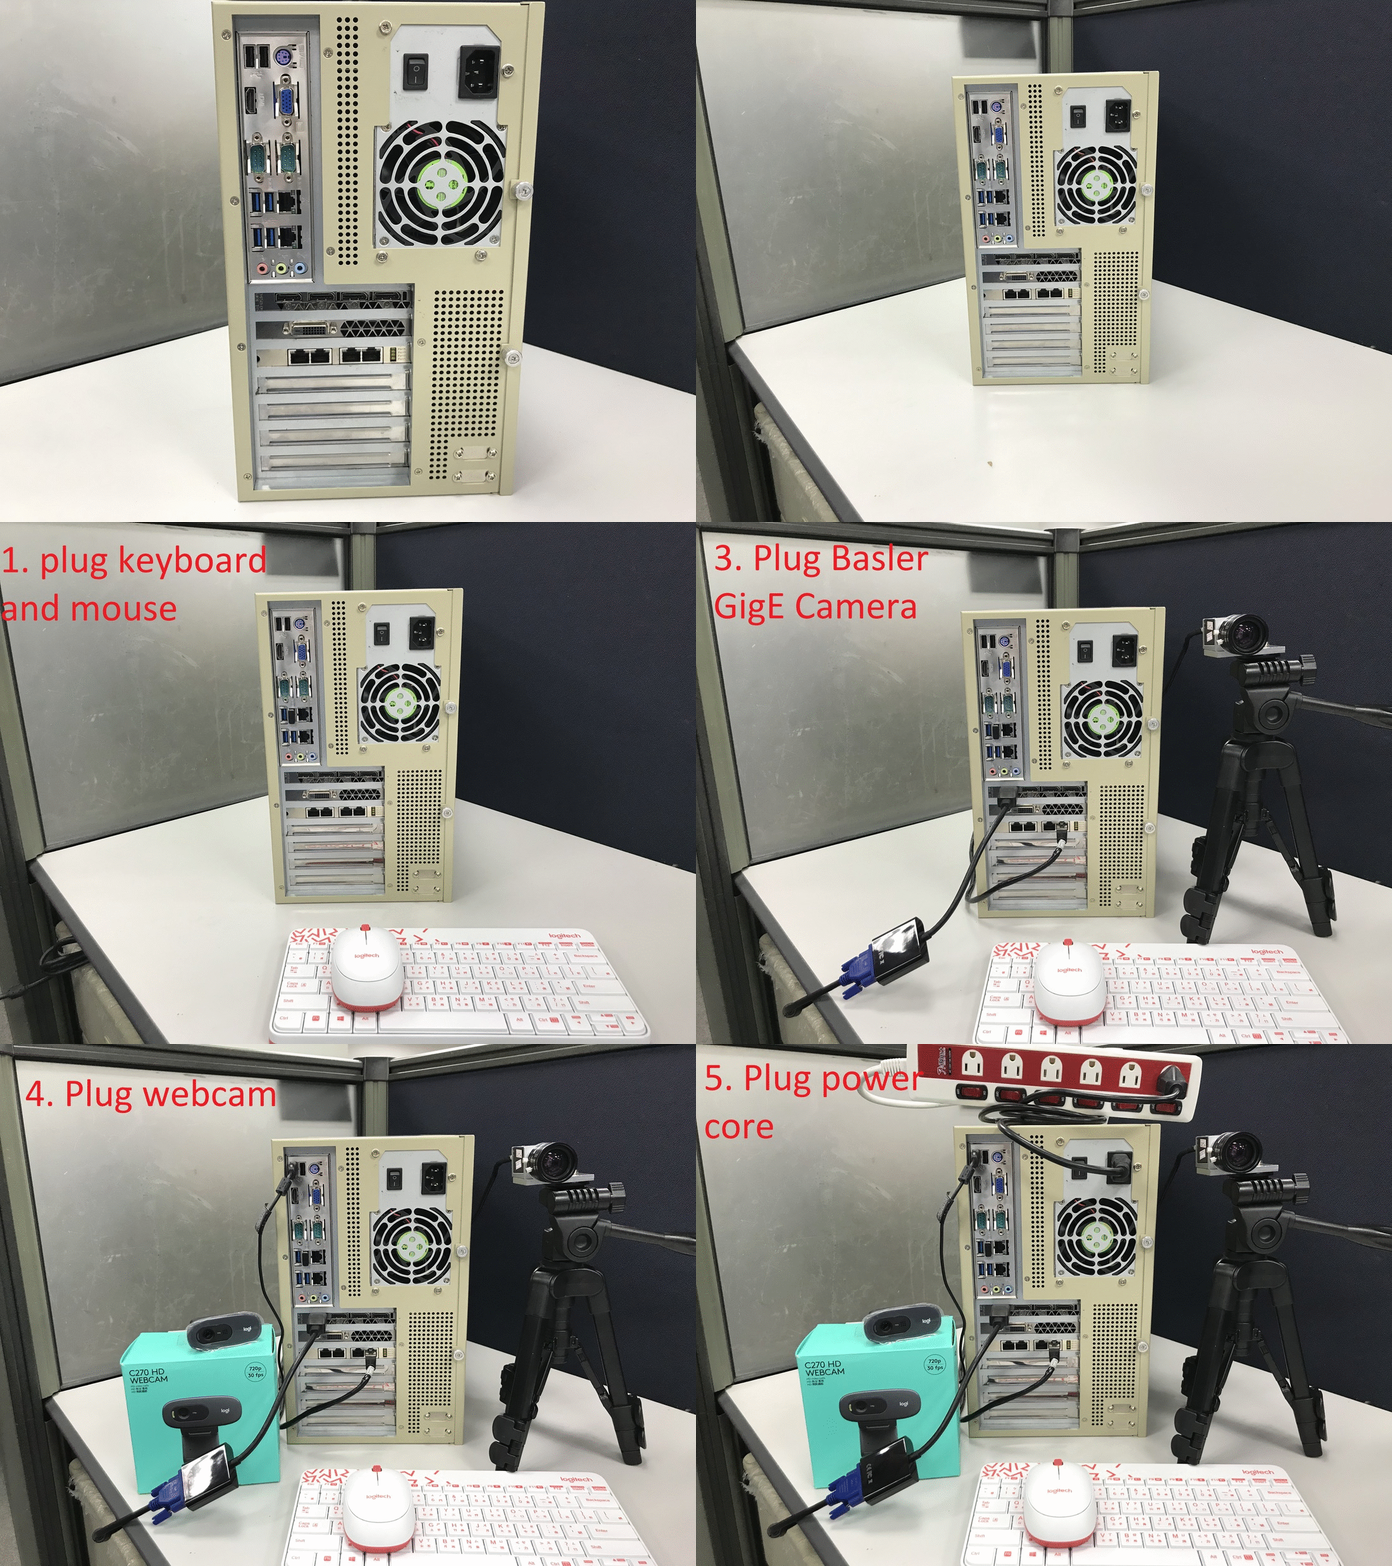
Step 1: Hardware wiring
- Connect the peripherals, keyboard, mouse, monitor and cameras.
- Connect 110V AC power source to the terminal block
- Power on

Step 2: Run inference with different source
The path of inference sample locates on the C:\Users\user\Desktop\ADLINK. You can select image, video, webcam or Basler GigE camera as inference source.
Open Terminal and paste commands below: - Image
  cd C:\Users\user\Desktop\adlink\darknet-For_basler_camera\build\darknet\x64
  yolo_console_dll.exe data/coco.names yolov3.cfg yolov3.weights C:\Users\user\Desktop\ADLINK\darknet-For_basler_camera\data\dog.jpg
Terminate program by close the Terminal or ctrl+c.
Video
cd C:\Users\user\Desktop\adlink\darknet-For_basler_camera\build\darknet\x64
yolo_console_dll.exe data/coco.names yolov3.cfg yolov3.weights test.mp4
Webcam
cd C:\Users\user\Desktop\adlink\darknet-For_basler_camera\build\darknet\x64
yolo_console_dll.exe web_camera
Basler GigE camera
Open pylon Viewer and make sure GigE camera works.
Key in commands
cd C:\Users\user\Desktop\adlink\darknet-For_basler_camera\build\darknet\x64
yolo_console_dll.exe basler_camera
or Click Run_basler_camera_with_Object_Detection.bat in folder