Train Custom Data by Yolov6
This tutorial primarily teaches users how to train their own AI models using custom data. The training environment for the model will utilize the training process from Meituan’s YOLOv6, as described in their documentation: Meituan YOLOv6 Training Process.
0. Before you start
Clone this repo and follow guide to install requirements in a Python3.8 environment.
$ git clone https://github.com/meituan/YOLOv6.git
1. Prepare your own dataset
Step 1: Prepare your own dataset with images and generate label files in YOLO format.
# class_id center_x center_y bbox_width bbox_height
0 0.300926 0.617063 0.601852 0.765873
1 0.575 0.319531 0.4 0.551562
Step 2: Organize directories.
Organize your directory of custom dataset as follows:
custom_dataset
├── images
│   ├── train
│   │   ├── train0.jpg
│   │   └── train1.jpg
│   ├── val
│   │   ├── val0.jpg
│   │   └── val1.jpg
│   └── test
│       ├── test0.jpg
│       └── test1.jpg
└── labels
    ├── train
    │   ├── train0.txt
    │   └── train1.txt
    ├── val
    │   ├── val0.txt
    │   └── val1.txt
    └── test
        ├── test0.txt
        └── test1.txt
Step 3: Create dataset.yaml in $YOLOv6_DIR/data.
# Please insure that your custom_dataset are put in same parent dir with YOLOv6_DIR
train: ../custom_dataset/images/train # train images
val: ../custom_dataset/images/val # val images
test: ../custom_dataset/images/test # test images (optional)

# whether it is coco dataset, only coco dataset should be set to True.
is_coco: False

# Classes
nc: 20  # number of classes
names: ['aeroplane', 'bicycle', 'bird', 'boat', 'bottle', 'bus', 'car', 'cat', 'chair', 'cow', 'diningtable', 'dog',
        'horse', 'motorbike', 'person', 'pottedplant', 'sheep', 'sofa', 'train', 'tvmonitor']  # class names
2. Create a config file
We use a config file to specify the network structure and training setting, including optimizer and data augmentation hyperparameters.
If you create a new config file, please put it under the configs directory.
Or just use the provided config file in $YOLOV6_HOME/configs/*_finetune.py. Download the pretrained model which you want to use from here.
## YOLOv6s Model config file
model = dict(
    type='YOLOv6s',
    pretrained='./weights/yolov6s.pt', # download the pretrained model from YOLOv6 github if you're going to use the pretrained model
    depth_multiple = 0.33,
    width_multiple = 0.50,
    ...
)
solver=dict(
    optim='SGD',
    lr_scheduler='Cosine',
    ...
)

data_aug = dict(
    hsv_h=0.015,
    hsv_s=0.7,
    hsv_v=0.4,
    ...
)
3. Train
# Be sure to open use_dfl mode in config file (use_dfl=True, reg_max=16) if you want to do self-distillation training further.
python tools/train.py --batch 32 --conf configs/yolov6s_finetune.py --epochs 200 --img-size 288 --data data/dataset.yaml --fuse_ab --device 0
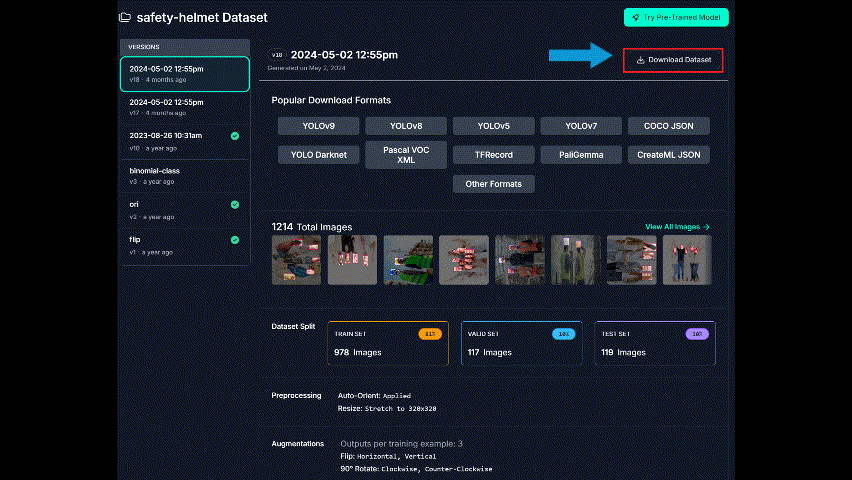
The following demonstration uses a safety helmet dataset from Roboflow.
Step 1: Download the model training environment and dataset from Roboflow. The images will be edited to hide sensitive information.
# Download the training environment
git clone https://github.com/meituan/YOLOv6.git
cd YOLOv6
# Download the dataset from Roboflow
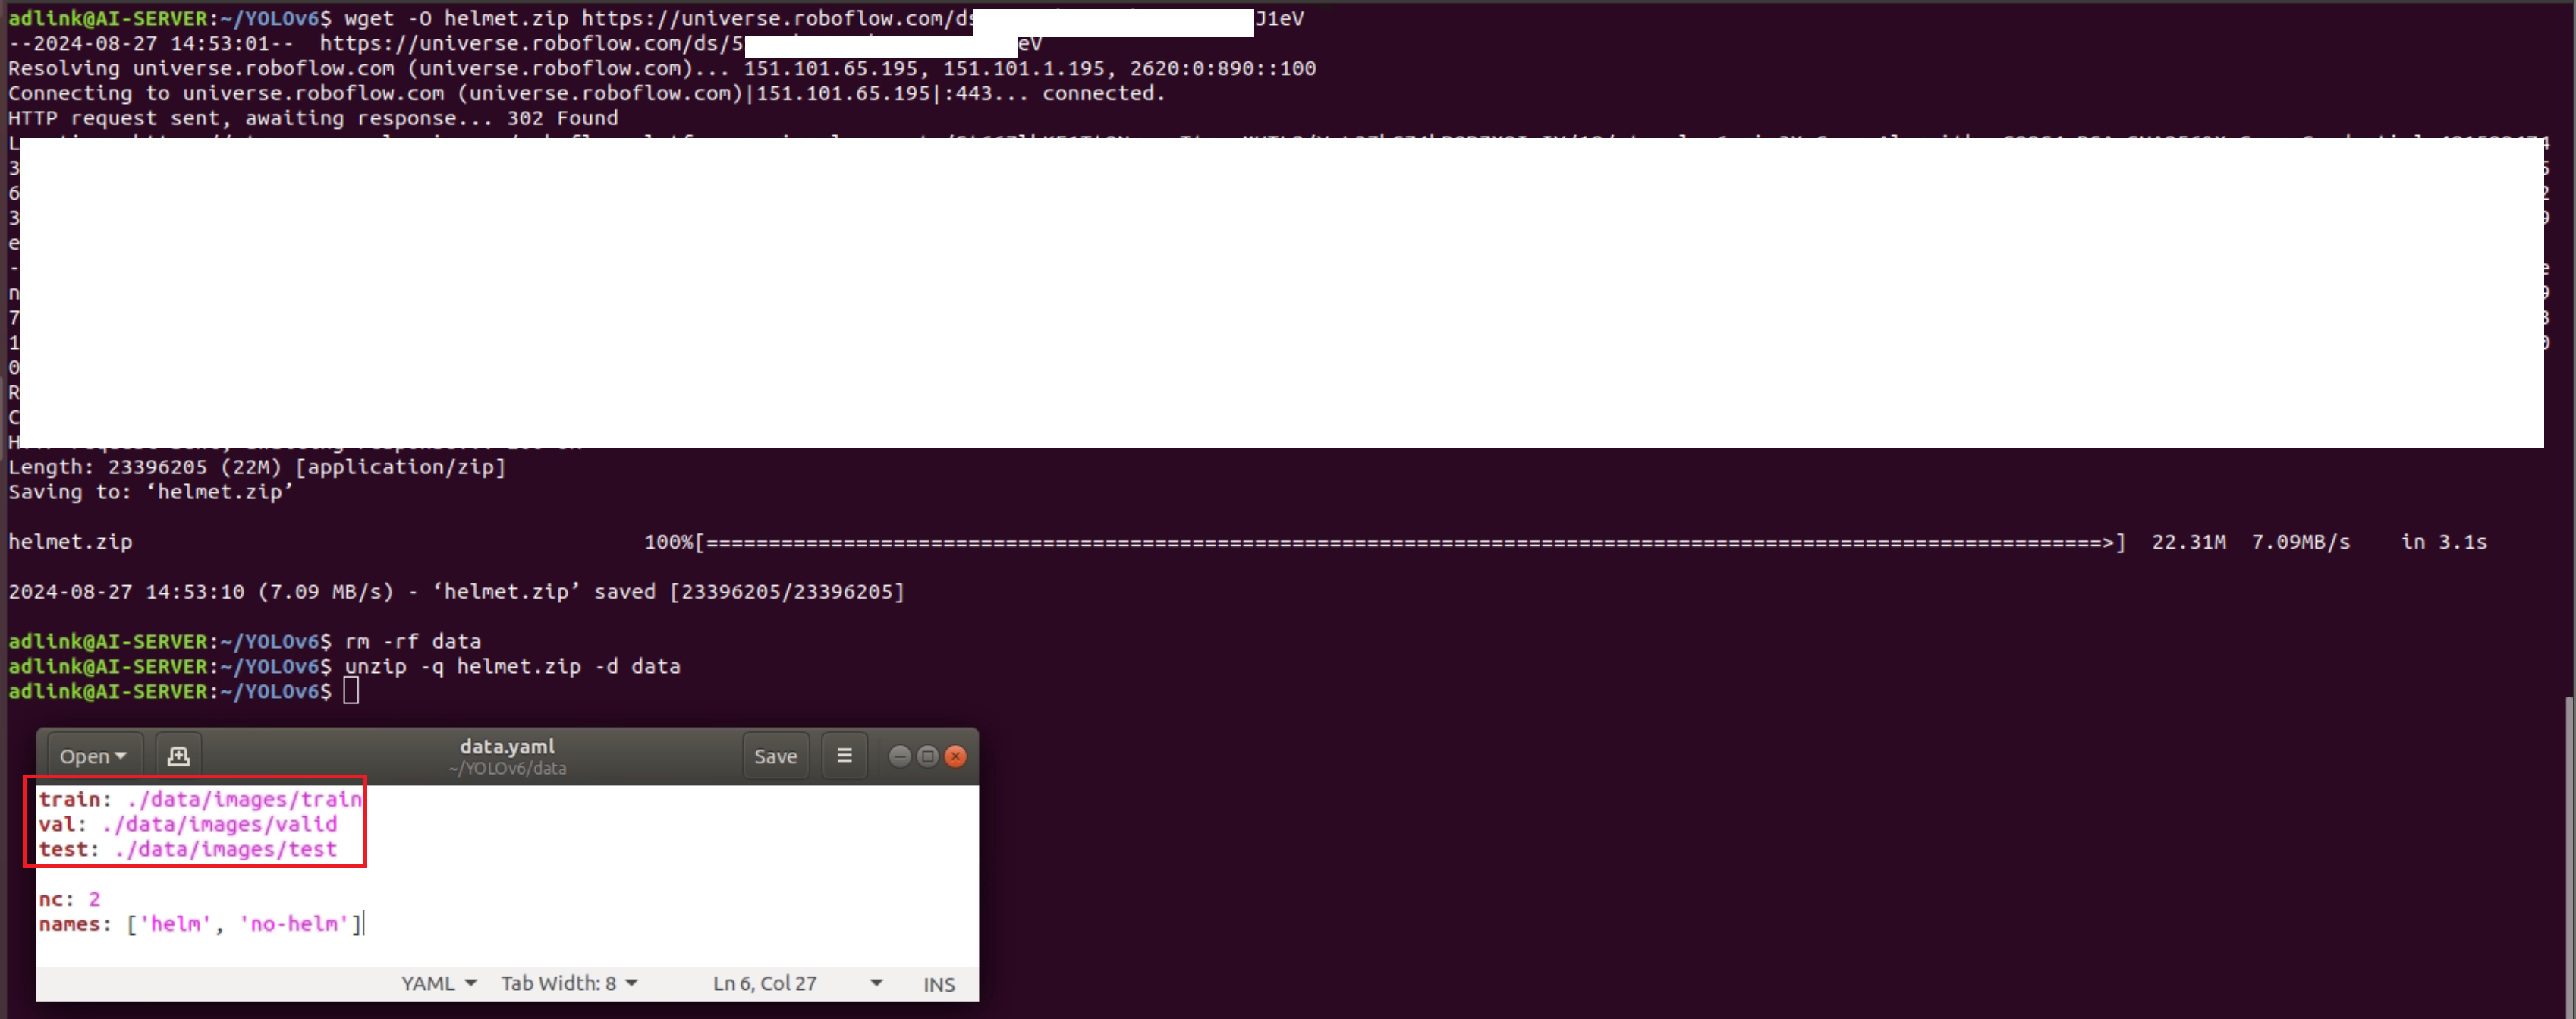
wget -O helmet.zip YOUR_LINK
rm -rf data
unzip helmet.zip -d helmet -q
Step 2: Modify the folder path in ./data/data.yaml.
Step 3: Train by customize data
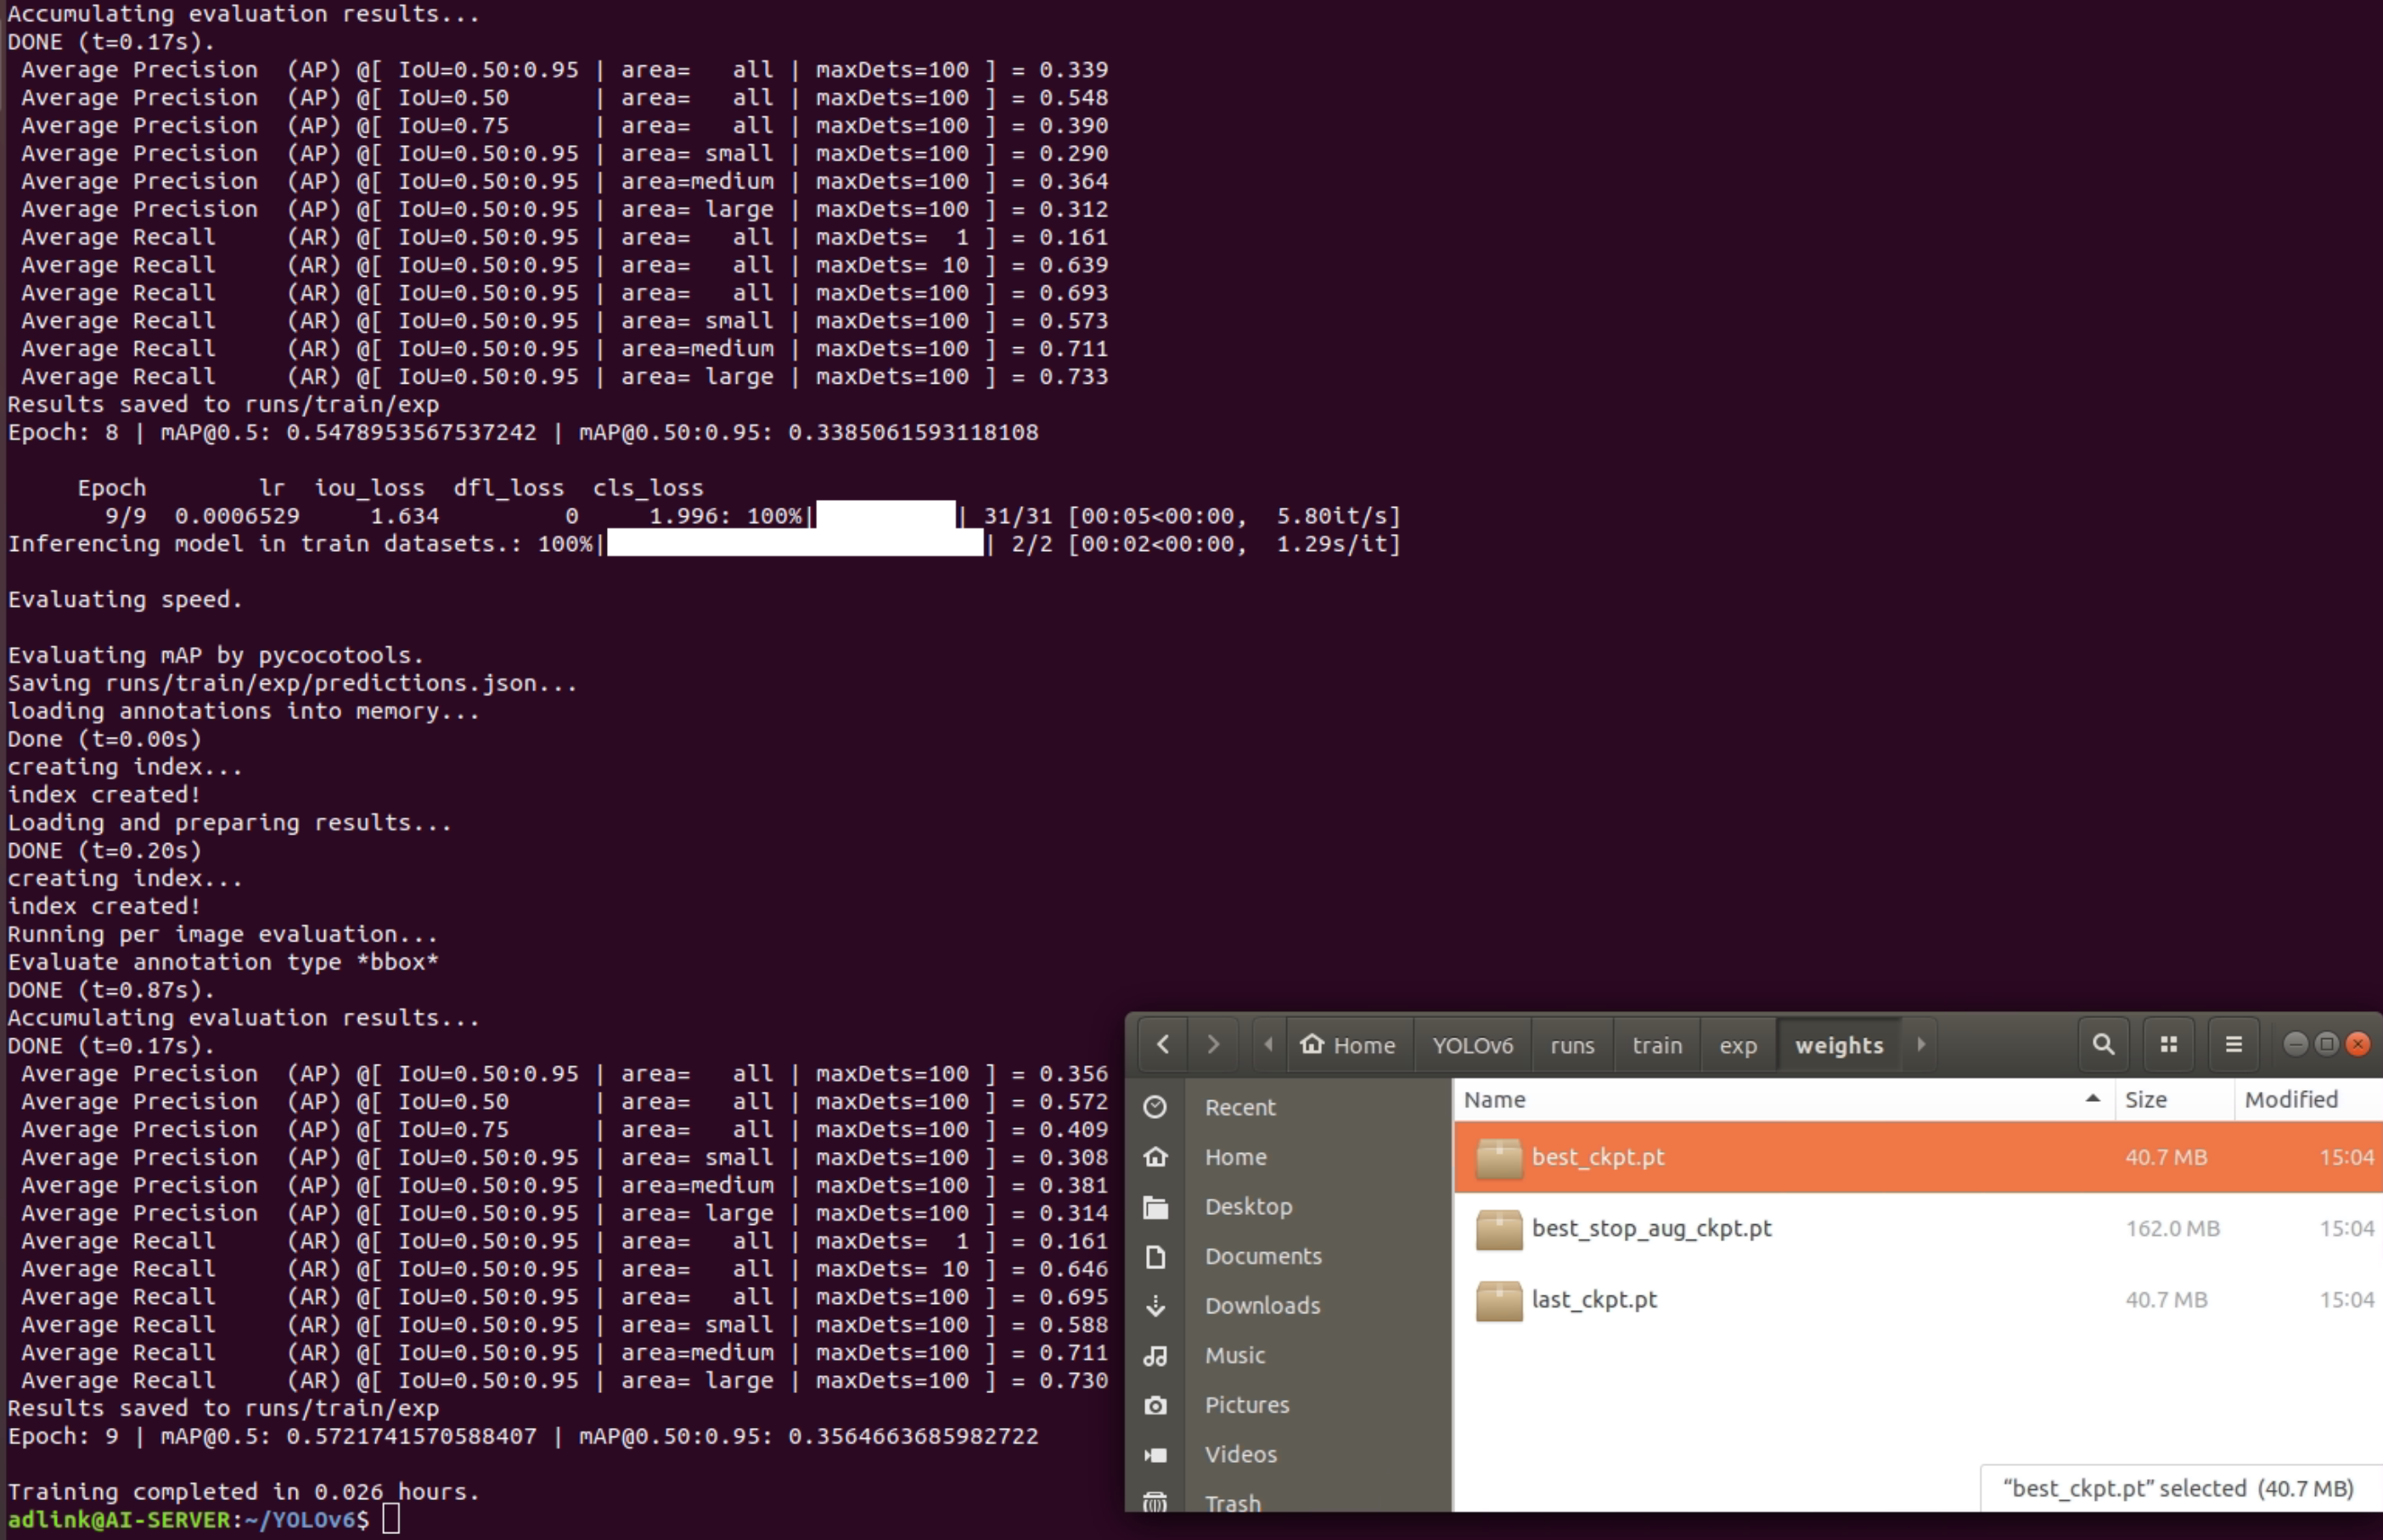
python tools/train.py --batch 32 --conf configs/yolov6s_finetune.py --epochs 10 --img-size 288 --data data/data.yaml --fuse_ab --device 0

#   --epochs EPOCHS       number of total epochs to run

Adjust the appropriate training parameters, and after patiently waiting for the process to complete, the model will be saved in ../YOLOv6/runs/train/exp/weights/best_ckpt.pt. The name of the “exp” folder will change with each training iteration.
Step 4: Convert pytorch model to DLC model
To execute on Neon-RB5, the .pt model needs to be converted to the ONNX format, and then further converted to the DLC format using the SNPE tool. Since the software environment version can affect model conversion, we recommend that the customer use the VM environment we provide for the conversion.
VM Environment(Download link):
- VMware Workstation 17 Player
- Ubuntu 18.04
- SNPE 1.68
ONNX 1.16.0
# Setup conversion environment
export SNPE_ROOT=/home/adlink/snpe-1.68.0.3932
export PYTHONPATH=$PYTHONPATH:$SNPE_ROOT/lib/python
# Convert *.pt to ONNX
cd ~/YOLOv6
python3 ./deploy/ONNX/export_onnx.py \
--weights ./deploy/ONNX/yolov6n.pt \
--img 288 \
--batch 1

# Convert *.ONNX to *.dlc
cd ~/snpe-1.68.0.3932/bin/x86_64-linux-clang
./snpe-onnx-to-dlc --input_network ~/YOLOv6/deploy/ONNX/YOUR_FILE.onnx  --output_path yolov6n_base_quantized.dlc